As an Amazon Associate, we earn from qualifying purchases. Some links on this site are affiliate links at no extra cost to you. Our recommendations are based on thorough research and editorial judgment.

Marking Gauges Explained: Wheel vs. Pin vs. Cutting Gauges
Ever tried marking a straight line only to end up with a wavy mess? It’s a common struggle for many DIY enthusiasts and woodworkers. The right marking gauge can make all the difference, and there are three main types you might consider: wheel, pin, and cutting gauges.
You may be interested


Wheel gauges feature a circular cutter that excels at making consistent, deeper cuts. They’re great for adding clear lines, but you might find they lack the precision needed for finer details. So, if you want something that’s reliable for deeper grooves but not necessarily fine work, a wheel gauge could be your go-to.
On the other hand, pin gauges have a sharp steel pin that glides along the grain of your wood. They’re pretty handy for tasks that require marking in the direction of the grain. Just keep in mind that while they excel at this, they might tear fibers if you’re marking across the grain. It’s something to think about, especially if you’re working on delicate projects.
Now, let’s talk cutting gauges. These come with a sharp blade that gives you clean lines, making them perfect for finer, detailed work. If you’re hoping to achieve that polished touch on your wood project, a cutting gauge is worth considering.
Understanding the differences between these tools will help you choose wisely based on your project needs. Remember, the best part is that each type has its own strengths and weaknesses.
So, what’s your next project? It might just require a specific gauge to get that professional touch!
Key Takeaways
- Pin gauges are budget-friendly and excel at marking along the grain, but can damage fibers when used cross-grain.
- Wheel gauges provide consistent scribe lines but lack precision; ideal for deeper cuts.
- Cutting gauges yield cleaner marks and are perfect for delicate work like joinery and veneers.
- Proper maintenance of marking gauges, including sharpening and cleaning, ensures accurate and efficient marking quality.
- Always mark on the waste side and follow grain direction to achieve smoother finishes.
The Basics of Marking Gauges: Types and Functions

Ever find yourself struggling to make those perfect lines when you’re woodworking? It can be frustrating not to get it just right. That’s where marking gauges come into play. These handy tools are crucial for creating clean and precise lines, ensuring your cuts are spot on—every time.
There are three main types of marking gauges you’ll want to know about: pin gauges, wheel gauges, and cutting gauges. Each serves a different purpose, so let’s break it down.
- Pin Gauges: These feature a steel pin set into a wooden bar. They do a great job of marking with the grain. However, when you’re working against the grain, be careful; they can tear the fibers.
- Wheel Gauges: This type uses a circular cutter that remains stationary. It’s perfect for getting consistent scribe lines, especially if you’re making deeper cuts across the grain.
- Cutting Gauges: Equipped with a knifelike blade, these allow for cleaner marks and are fantastic for delicate projects like veneer work.
So, why does this matter? Choosing the right marking gauge can significantly affect the accuracy of your projects. If you’re looking for visibility and precision, try each one out and see which suits your style best. Honestly, you’ll appreciate the little differences each tool offers when you’re deep into a project.
Marking gauges might seem simple, but they’re fundamental for successful woodworking. Think about which type you need for your next job, and you might find your work becomes that much easier. What’s your favorite marking tool?
For added durability and ease of use, consider marking gauges made from solid brass or aluminum alloy, which provide long-lasting performance and precision.
Comparing Wheel, Pin, and Cutting Gauges: Key Differences

Choosing the right marking gauge can feel overwhelming, especially when you’ve got different types on the market. Have you ever found yourself staring at wheel, pin, and cutting gauges, unsure which one to grab? Let’s break down the differences so you can pick the best tool for your woodworking project.
Wheel gauges come with a beveled circular cutter. They’re fantastic for cross-grain marking and make the task a breeze. If you’re doing a lot of that kind of work, you’ll appreciate how smoothly they glide over the surface. On the other hand, pin gauges are equipped with a steel pin that’s best for marking along the grain. Just a heads up though: they struggle with cross-grain tasks and can leave you with torn fibers.
Then we have cutting gauges, which feature sharp knife blades. These are perfect for delicate work, like when you’re dealing with veneers. And here’s the kicker: while pin gauges can dull quickly, wheel gauges tend to hold their sharpness because they don’t rotate during use.
So, what should you consider when picking one?
- Wheel Gauges: Great for easy cross-grain marking.
- Pin Gauges: Good visibility for along-the-grain marking, but tricky with cross-grain.
- Cutting Gauges: Excellent for precision work on delicate materials.
Think about the projects you’re tackling. Do you need precision for intricate work, or are you mainly marking straight lines? Honestly, understanding these tools clears up a lot of confusion.
To sum it all up, wheel gauges are fantastic for quick marking, pin gauges help you see your marks, and cutting gauges give you that accuracy for fine details. What’s your next project going to be?
For even more precise woodworking tasks, pairing your marking gauge with a reliable depth gauge can significantly improve your measurement accuracy.
Recommended Products
36-INCH T-GLIDE FENCE ASSEMBLY: The 36-inch T-Glide Fence & Rail are made of heavy-gauge steel for sure lockdown and reliably square cutting for years without deflection.

KREG KREG FOREMAN BENCH POCKET HOLE DB210

Steel Utility Truck: Perfect for moving appliances, boxes, tools and other heavy duty hauls; Hand truck features a versatile P handle for one hand operation and 10" solid wheels for easy maneuverability
Key Pros and Cons of Wheel, Pin, and Cutting Gauges

When it comes to woodworking, finding the right tool can be a bit tricky. You might be asking yourself, “Which gauge should I use?” That’s where understanding the pros and cons of wheel, pin, and cutting gauges comes into play.
Wheel gauges shine when marking across the grain. They create deeper cut lines, which is great for certain projects. But here’s the catch: they aren’t always the most precise tool available. So, if you need accuracy, you might want to look elsewhere.
Pin gauges, on the other hand, are budget-friendly and work wonders for creating wide lines along the grain. But don’t expect them to be gentle on the fibers; they can tear them up when you’re working cross-grain. So, if you’re after clean edges, you might need to consider other options.
Cutting gauges are a solid choice, as they come with a knife blade that cuts through fibers neatly. This means they can create cleaner lines than pin gauges, especially when it comes to joinery. If you’re tackling veneers or need tight-fitting joints, a slicing gauge is the way to go. It helps prevent the tool from wandering while marking, leading to better accuracy.
For enhanced precision and ease of use, consider tools with foldable designs that simplify storage and transport.
Recommended Products

Adjustable angle indicators on the blade bevel scale for repeatable bevel cuts

Riving knife maintains close blade proximity to reduce chance of kickback
Exclusive 50-in. commercial XACTA fence II with T-square design
Choosing the Right Gauge for Your Project
Finding the right gauge for your woodworking project can feel overwhelming, especially with so many options out there. But think about this: the right tool can really elevate the quality of your work. For instance, when you’re marking tasks along the grain, pin gauges really shine. They give you those wide, visible lines that make it a breeze to follow.
Now, if you’re aiming for precision, say when you’re working on dovetails or veneers, slicing gauges are the way to go. They cut neatly across the grain and that’s a big plus when you need accuracy. Got some intricate designs or deeper cuts to tackle? Wheel gauges can be useful, too. Just keep in mind that their disk-shaped fence might not offer the most support—something to consider as you’re working. For optimal results, combining the use of marking gauges with reliable bench holdfast clamps can help ensure stability and accuracy in your workpieces.
Recommended Products

Easy to Use - The square head can be moved up and down on the rule with a lockable assembly and a specially designed bolt to engage the slot for stability and versatility while measuring.

Powerful Precision - Nails with powerful precision for crown molding and other surfaces

All-in-One Layout Tool Set - Includes square, center, and reversible protractor heads with a 300mm (11-3/4") blade for layout, measuring, and angle marking applications. This set provides long-lasting durability and dependable performance.
Using Marking Gauges: Best Practices
Ever struggled to get that perfect line with a marking gauge? You’re not alone! Getting clean lines is key in woodworking, and using a cutting gauge for cross-grain work can really help. It’s fantastic for minimizing fiber tearing, which is something we all want to avoid.
When you’re working with pin gauges, here’s the trick: maintain consistent pressure and tilt the beam just right until the pin just touches the wood. That’ll give you clear markings and keep the grain in good shape. Starting from one edge and meeting in the middle when scribing can also really help reduce splintering. So, why does this matter? Because clean lines lead to better-fitting joints and a more polished final product!
If you find yourself taking on complex projects often, think about making duplicates of your favorite gauges. This can keep your settings consistent and save you a ton of time. And let’s not forget the importance of maintenance! Regularly checking your blades and pins can mean the difference between a smooth cut and a frustrating experience.
In the end, using marking gauges effectively boils down to understanding a few simple techniques. Be sure to consider the material quality of your tools, as durable hardwoods and metals like brass can greatly improve performance and longevity. So, what’s stopping you from experimenting with these tips in your next project?
Recommended Products

SPECS - MTCGSS-DEL-24 Features one MT Center Gauge tool and all 9 stainless steel marking bars in inch and metric. Includes 1/4", 3/8", 7/16", 1/2", 4mm, 5mm, 6mm, 8mm, and 10mm thick bars.

High Precision Tool - The Starrett 257B surface gage features a 9"/12" spindle for accurate scribing, measurement transfers, and surface inspection, catering to professionals and hobbyists alike.
Features a 5-amp induction motor, a 12-inch swing, and a 3-1/8-inch spindle travel
How to Keep Your Gauges Sharp and Ready
Have you ever tried to make a precise cut, only to find your marking gauge isn’t up to par? It’s frustrating, right? Keeping your gauges sharp is crucial if you want clean and accurate markings, and a little maintenance goes a long way.
Start by routinely sharpening the blades of your slicing gauges with some abrasives. This keeps the surfaces flat and ensures you’ll get those tidy cuts no matter what type of wood you’re working with. Now, if you’re using pin gauges, consider tweaking the pin’s geometry for deeper cuts. It can really make a difference in accuracy.
When it comes to wheel gauges, make sure to rotate the dull edges of the circular cutter. That way, you’re always working with a fresh cutting surface. After each use, don’t forget to clean all your gauges thoroughly. You want to prevent any resin buildup that might just ruin your next project.
Lastly, pay attention to those locking mechanisms, like thumbscrews. Keeping them adjusted and free from debris ensures reliable performance and better usability. Using ergonomic designs for your tools can also minimize fatigue during extended work sessions, improving overall comfort.
Does all this maintenance sound like a lot? Honestly, it takes just a bit of time, and it’s worth every second for the quality of your work.
To wrap it up, sharp and well-maintained gauges make a significant difference in your woodworking. So, what’s your next project, and how can you prep your tools for it?
Troubleshooting Common Issues With Marking Gauges
Ever had one of those days where your marking gauge just won’t cooperate? It can really mess with your woodworking project. If your gauge isn’t cutting well, there’s a good chance that the cutter is dull. A blunt edge on slicing or wheel gauges can lead to marks that are all over the place—so keeping your tools sharp is key.
When you’re marking across the grain, keep an eye out for torn wood fibers. If you notice that happening, here’s a trick: switch to a cutting gauge. This will help you achieve cleaner lines. Remember, it’s best to mark on the waste side, and following the grain will give you a smoother finish.
Struggling to see your lines on darker woods? A sharp pencil can be your best friend here, as it really helps to pop those scribed lines. Also, make sure to double-check that your fence is locked before you start. It’s often the little things that can make a big difference. Try making several light passes instead of one heavy stroke to get the best results.
For consistent and accurate marking, using a stable workbench with sufficient support can greatly improve your gauge performance.
Recommended Products

Ultra-durable Felco pruners with forged aluminum handles and replaceable steel blades for precision gardening.
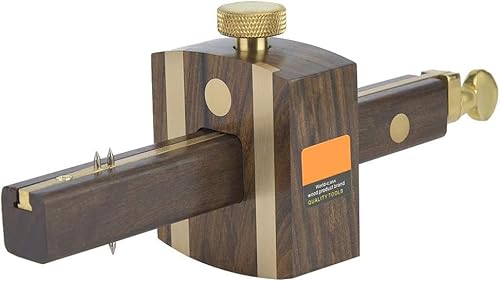
EBONY AND BRASS MATERIAL - Our adjustable marking gauge woodworking is made of sturdy ebony and brass which are solid and with good hardness and can serve for long time using lightweight for carry out to work
✔️ All-in-One Measuring & Marking Tool Combines layout, thickness, internal and external measurements, and scribing in one compact precision tool.
Frequently Asked Questions
What Is the Difference Between a Marking Gauge and a Cutting Gauge?
A marking gauge’s functionality focuses on scribing accurate lines, while a cutting gauge provides precision cuts. When comparing woodworking tools, we value measuring accuracy techniques and gauge materials for peak performance in our projects.
What Are the Different Types of Marking Gauges?
In woodworking, we have several types of marking gauges, including pin, slicing, and wheel gauges. Each offers unique tool selection based on gauge materials and user preferences, ensuring marking accuracy in our projects.
What Is a Wheel Marking Gauge Used For?
We’re telling you, wheel marking gauges revolutionize wheel marking applications! With unmatched wheel marking accuracy, they excel on various materials. Their advantages in deep cuts and intricate techniques make them essential for any serious woodworker’s toolkit.
What Does a Pin Gauge Determine?
A pin gauge determines the depth and width of marking lines in woodworking. With proper techniques and materials, we can enhance pin gauge accuracy, leveraging its advantages for quick applications, despite potential challenges across the grain.


