As an Amazon Associate, we earn from qualifying purchases. Some links on this site are affiliate links at no extra cost to you. Our recommendations are based on thorough research and editorial judgment.

Nail Sets: How to Sink Fasteners Without Marring the Surface
Have you ever tried to sink fasteners and ended up with a marred surface? It can be frustrating, especially if you’re aiming for a polished look. The good news is, there’s a simple tool for this: a nail set.
You may be interested


With a little patience and the right technique, you can drive finish nails below the wood without damaging the surface.
First off, choosing the right tip size for your nails is key. Each nail set tip is designed for specific sizes of nails, so make sure to pick one that fits. Generally, you’ll want to sink those nails about 1/8 inch below the surface of the wood.
Here’s a little trick: align the nail set with the nail head as carefully as possible. This prevents any misalignment that could lead to an uneven surface. You might need to tap it a few times, but with a bit of practice, you’ll get the hang of it.
Remember, the better you align and sink those nails, the nicer your finish will look. It does take some time, but it’s worth it when you’re aiming for a project that looks professional. So, why does this matter?
Because every detail counts when you’re crafting something special.
In the end, you’ll find that using a nail set is a small but crucial step in achieving that flawless finish you’re after. Why not give it a try on your next project? You might just be surprised by the results!
Key Takeaways
- Choose the correct nail set tip size that matches the nail head diameter to avoid surface damage.
- Align the nail set accurately with the nail dimple to prevent misalignment and marring.
- Sink nails approximately 1/8 inch below the surface for easy touch-ups with putty after installation.
- Use a self-centering nail set or a hollow shaft design for precise placement over nail heads, reducing the risk of slippage.
- Maintain consistent pressure while striking the nail set to ensure nails are seated properly without damaging the wood.
Using a Nail Set for Flawless Finishing

When you’re working on a project and want everything to look perfect, dealing with nail heads can be a real pain. This is where a nail set comes in handy. It’s that nifty tool that lets you drive finish nails just below the wood’s surface, so you won’t have to see those annoying nail heads poking through.
To really nail this (pun intended), match the tip size of your nail set to the diameter of your nail head. That way, you’ll have way less slipping and more accuracy. Aim to sink those nails about 1/8 inch below the surface. Why bother with that depth? It makes it so much easier to touch up later with putty.
Here’s a trick: align the nail set carefully with the dimple of the nail, and take your time with the hammer strikes. A steady hand can really make a difference in keeping your wood finish looking pristine. Honestly, nobody wants a beautiful piece of work ruined by a misaligned hammer strike.
In short, using a nail set can really elevate your finish. Don’t overlook this little tool—it’s worth taking the extra time to use it right. So, the next time you’re working on a project, how will you approach those nail heads? Choosing a set made from durable materials can ensure your nail punches last through many projects.
Recommended Products

We have USA stock and can ship you by local truck next day after you ordered,all cost covered.You never have to wait for long time and never have customs clearance issue.
4-Motor Precision Adjustability: Silent electric motors independently control height, backrest, leg rest, and tilt for perfect positioning in the spa or exam treatment sessions.

TIME = MONEY | Make the shift from hand finishing tools to automatic tools and dramatically increase your finishing speed with no compromises in quality.
Different Types of Nail Set Tools for Your Projects

Are you tired of bent nails and uneven surfaces when you’re working on projects? Nail sets can really change the way you finish your work. There are different types available, so knowing which one to choose is key to getting the job done right.
Self-centering nail sets are perfect if you’re working with smaller nails up to 6d. They help keep everything aligned while you tap in the nail. On the other hand, if you’re dealing with flooring, a flooring nail set is the way to go; these tackle larger nails, anywhere from 12d to 20d. The right tool can make a huge difference.
Many nail sets feature a hollow shaft, which allows for precise placement over the nail head and reduces the chances of slippage. So, why does this matter? Accurate placement means fewer mistakes and a cleaner finish. Also, take a look at the size of the tips. Typically, they range from 1/32 inch for 4d nails to 6/32 inch for 12d nails. Having the right size tip is essential for effectively driving in the nail without damaging your workpiece.
Here’s the trick: some nail sets even come equipped with knuckle protectors to keep your hands safe while you’re hammering away. And if you prefer a hammer-free experience, check out those with a spring mechanism. They can really make the task more efficient and comfortable, especially for longer projects.
Choosing tools made of durable materials similar to those used in heavy-duty cast steel can improve the longevity and reliability of your nail sets.
In the end, choosing the right nail set for your projects can save you time and frustration. So, what project are you planning next? Make sure you have the right tools ready!
Recommended Products

Dual-action gravity-feed airbrush with a 1/3 oz. funnel shaped cup

PREMIUM 6.5 FT BLUE SPRUCE DESIGN: Designed by Martha Stewart, this 3-tier artificial Christmas tree measures 6 ft 5 in tall x 3 ft 11 in wide, with a 22 in stable metal base for confident, wobble-free display

Tank Compressor: Features the TC-326T Cool Runner II 1/5 hp single-piston compressor. The 3-liter air storage tank provides constant air pressure and no pulsation for consistent results.
Understanding Nail Sets and Their Essential Uses

Got a project where you’re dealing with finish nails? Ever find yourself frustrated trying to get those nails perfectly below the surface? That’s where nail sets come into play. These handy tools, also known as nail punch tools, are short, tapered bars made of steel that help drive finish nails below the wood surface. They’re fantastic for keeping your materials intact and making everything look neat—especially when you’re working with decorative molding or wood floors.
The right nail set size makes a huge difference. For instance, if you’re working with 4d nails, a 1/32 inch tip is a perfect fit. If you’re tackling 12d nails instead, reach for a 6/32 inch size. A good nail set usually has a hollow shaft to help you place nails precisely, and it should be tough enough to endure repeated hits without chipping.
So, why does this matter? Well, using a nail set ensures you don’t damage the finish of your wood, which can save you time and hassle in the long run. If you’ve ever had to go back and fix a dent or a surface flaw, you know how important it is to get it right the first time.
Truth is, investing in a quality nail set can elevate your DIY projects. Using tools with precision and durability similar to those found in quality laser plumb bobs can improve your overall project accuracy and finish. So grab one and see how it can help you achieve that professional finish you’ll be proud of. What projects are you tackling next that could use a small tool like this?
Recommended Products

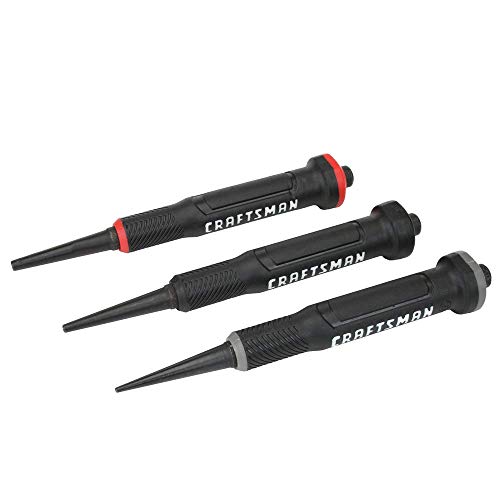
country of origin : United States

Outstanding precision and control.

1. NAIL SET INCLUDES :This nail punch set includes 1 dual-head nail setter with a head size of 1/16 inch and 1/32 inch (1), 1 dual-head center punch with a head size of 1/8 inch and 3/16 inch (2), 1 single-head hammerless cold chisel with a head size of 5/16 inch (3),1 door hinge pin removal punch with a head size of 1/8 inch (4), and 1 trim nail punch with retaining clip with a head size of 1/5 inch (5).
Top Maintenance Tips for Your Nail Sets
Taking care of your nail sets is just as critical as using them the right way. Have you ever pulled out a tool only to find it’s seen better days? Regularly checking your nail sets for any signs of wear or damage can save you frustration down the line.
Selecting the right size for your finish nails is vital too. If they’re too big or too small, you could end up with a mess. After you’ve finished using your nail sets, do yourself a favor: clean the tips. It helps maintain accuracy and keeps rust or debris from building up and messing with your projects.
Storage matters as well. Try this: keep your nail sets in a protective case or a tool organizer. It’ll help prevent bending or chipping, which can happen all too easily. Plus, practicing on some scrap wood is a great way to refine your technique and boost your confidence. Why not make it a routine?
Additionally, using high-quality materials such as martensitic stainless steel tools enhances durability and overall performance.
With these practical tips, you can keep your nail sets in good shape, making your projects smoother and reducing the risk of any unwanted surface damage. So, what are you waiting for? Take a moment to give your tools some TLC!
Recommended Products

Oyster shucking knife adopts blade reinforcement design-This Oyster shucking Knife is a full-handle knife, made of 2.5mm stainless steel 2Cr13 blade, copper head and steel nails .Oyster shucker is strong and long-lasting, and oyster shucking kit not easy to break and bend.
Bi-material grip for comfort and ease of use

PRECISE & SAFE TRIMMING: Crescent blade design ensures accurate cuts for dogs and cats, preventing nail splitting or injury to the quick.
Common Nail Set Troubleshooting Tips
Ever had one of those days where your nail set just isn’t cooperating? It can be frustrating when you’re trying to keep your project looking sharp, but those pesky nagging issues pop up. One important tip is to make sure the nail set tip is perfectly aligned with the dimple on the finish nail. If it’s off, you’re setting yourself up for slippage and an uneven finish.
Using the right tip size makes a world of difference. If you’re using a nail that’s too long for the wood or applying too much pressure, you might end up with surface marks. A good rule of thumb? Pick a nail set with a softer head—this can minimize chipping when you hit it multiple times. And remember, consistent pressure while striking is crucial to get that nail seated correctly without marring the surface. Consider also the material and design of your hammer to ensure precision and reduce fatigue during extended use.
Recommended Products

The sleeper sofa includes an inner spring, quilted top queen mattress and features a Leggett & Platt mechanism
The sleeper sofa includes an inner spring, quilted top queen mattress and features a Leggett & Platt mechanism

This set includes sofa, loveseat, chair, and ottoman.
Frequently Asked Questions
What Do You Use to Countersink a Nail Below the Surface?
To countersink a nail below the surface, we use a nail set. Nail selection is essential; different sizes guarantee proper fitting. This technique lets us achieve a smooth finish without marring the wood’s appearance.
What Do You Use to Sink Nails?
We use a nail set for sinking nails—it’s a precise tool that guarantees flawless finishes. While other methods might damage surfaces, this nail technique helps us achieve a professional look without the hassle.
How to Countersink Brads?
To countersink brads, we’ll use a nail set or punch tool. If we consider alternatives, finish nails or screws might work too, but they’ll require different techniques. Let’s make certain our brad heads are perfectly aligned!
What Tool Is Used to Sink Nails?
We use nail sets for sinking nails, especially finish nails, without damaging the wood. It’s essential for achieving a seamless look in our projects, whether working with decorative molding or flooring. Precision matters!


